The recording is a process in which you can save what you are doing on your computer screen in the form of video. It can record everything that you are doing on your screen. That is the reason this process is known as Screen Recorder.
Recording screen on Windows 10
You have very probably been using Windows 10 For quite a while now, but it does not mean that you’ve found everything it has to offer you. The operating system is packed with features, however, there are a few which are hidden away to the extent that they might be considered secrets.
One such gem is the screen recording tool. What? You did not know that Windows 10 could record videos of onscreen Action? You are not alone. The screen recorder is built in the Game bar and You might well not have noticed it. If you have ever wondered how to make a video of What you are doing in Windows, this is exactly the utility you want. Here is the best way to get and use it — including details of a keyboard shortcut key.
Way 1: Using Game bar Facility
The display recorder is not a standalone Utility, so in the event that you have a browse through the Start menu, then you won’t find it. You may, however, be able to discover the Game bar — but if you are not a gamer, then you might have seen this tool and thought nothing of it. Have a look at the Start menu and then search for “Game bar” or, in case you are a fan of keyboard shortcuts, then hit the Windows key and G simultaneously.

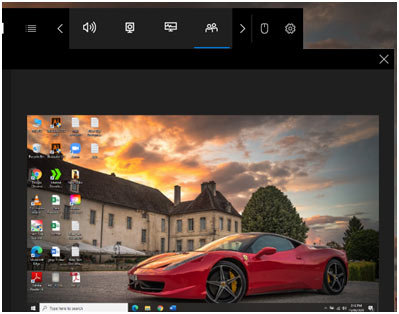
- The Game bar will appear, along with the “Game capturing” caption that’s shown under the time in the window which appears gives a clue to what’s possible.

- You’ll notice that a”record” button — the circle icon or you could press the Windows key + Alt + R at precisely the exact same time to begin recording. In fact, there is no need to start the Game bar at all; you can just use the keyboard shortcut to begin recording screen action.
- It’s likely You Will see a message Notifying you that screen recording isn’t accessible because gaming features have never been enabled. No problem! Simply mark the box in the window which appears and recording will begin.
- Recordings are automatically saved in MP4 Format in the Videos > Captures subfolder of your user folder. You can also access the files via the Game bar.
2. Recording in the Background
Maybe You have done something in your Pc and suddenly wished you had captured the moment? Together with the Windows 10 Game Bar, you are able to record the past several minutes or seconds of screen action after you have already performed it.
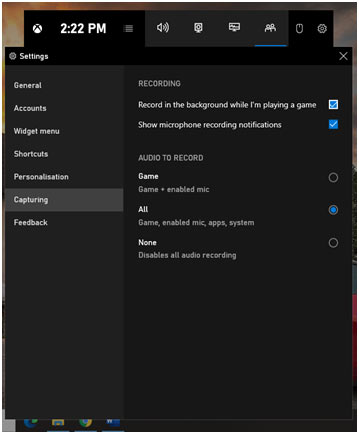
- To do this, you first need to give Permission for the pc to record your actions in the background. Open the Game Bar and click on the Settings icon. Scroll down the Settings display and check the box to Record in the background while I am playing a game. While here, you can click on the drop-down menu to Record the past and change the period to anywhere from 15 seconds to 10 minutes.
- Now you need never forget a minute again. Just click on the Record past 30-sec button, and a video is created based on the number of minutes or seconds you set.
3. Using Microsoft PowerPoint
- First, Start Microsoft PowerPoint. Then Pick the Insert tab and Screen Recording.

- Then select which section of your display you Want to record with the Select Area tool. You might even use the hotkey WINDOWS + SHIFT + A. Click and drag the cross hairs to choose your recording region. If you don’t need to record music, press WINDOWS + SHIFT + U to toggle it.
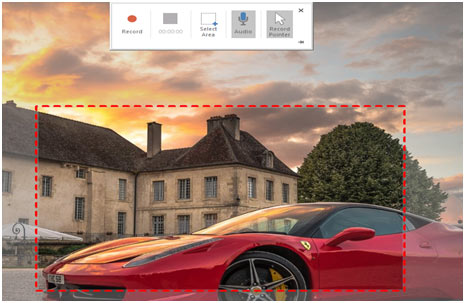
- As soon as you’re ready, press the Record button.
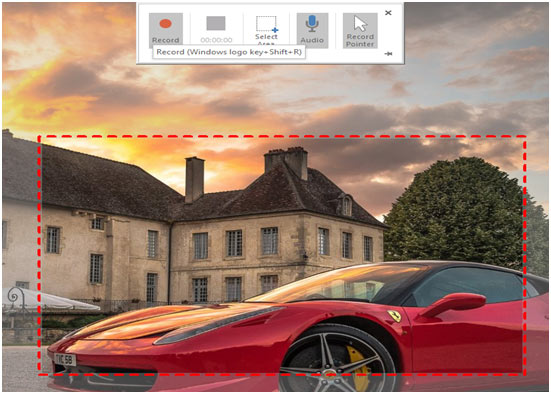
- The little control panel will disappear Unless pinned, however, you can make it reappear by moving your mouse towards the upper edge of this display.
- Once you are done, press the Record button again. The video will be automatically embedded on your slide, and you can Select FILE > SAVE AS to save your presentation. If you only want to save the video, select FILE>SAVE MEDIA AS and choose the destination Video and folder name.