The Photoshop software offers many image editing attributes for raster (pixel-based) images in addition to vector graphics. It uses a layer-based editing system that enables image creation and altering with a number of overlays that support transparency. Layers can also act as masks or filters, altering underlying colors. Shadows and other effects can be added to the layers. Photoshop actions include automation features to decrease the need for repetitive tasks.
Learning the benefits of background removal
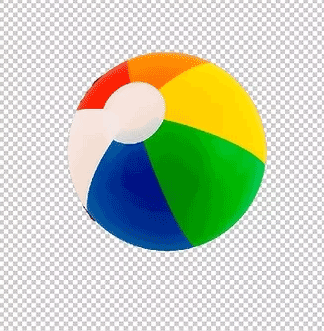
Sometimes no single photo captures exactly what you need: In one shot your subject may be blurry, and in the next, the background may not appear clearly. You need to combine the photo background of the first image with the subject of the second. That is where understanding how to remove image backgrounds in a photo editor can be a beneficial skill.
First way of removing the background
Follow these steps to remove the background from the images in Photoshop.
Step 1:Select content with well-defined edges.
Use the Quick Selection tool to select content with well-defined, high-contrast edges. Then add or subtract from it to capture exactly what you would like.
Step 2: Replace solid color backgrounds.
If your image includes a subject against a white background like a studio background, it is simple to swap out the background using the Magic Wand tool and layer masks. (Remember, with layer masks, none of your photo editing is permanent. You can always return to your original image file.)
Step 3: Remove non-contiguous backgrounds.
Find out how to use the Magic Wand tool to make automatic selections of nonadjacent background regions of similar color. Uncheck Contiguous and play with the Tolerance field to adjust the level of color variation that you need to allow inside your selection.
Step 4:Separate subject from the background, even where they blend.
Capture fine details like hair or fur by opening the Select and Mask workspace. Use the Lasso or Quick Selection tools to capture a simple outline of the subject and then use the Refine Edge brush to enhance your selection. With Edge Detection and Global Refinements sliders, you can fine-tune your selection even more.
Step 5: Achieve a consistent look.
If the light of your new background does not quite fit that of your subject, it is possible to create consistency by duplicating the New Background layer and using the Blur filter to bring them together for a more natural appearance.
Second way of removing the background
Follow these steps.
Step 1: Open an image with a solid background.
This method works best if the background is a solid color, or near a solid color. Use the following steps to open and picture in Photoshop:
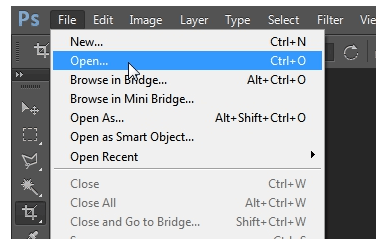
Click File then click Open.
Select an image with a background you need to delete.
Click Open.
Step 3: Create a layer from the background layer.
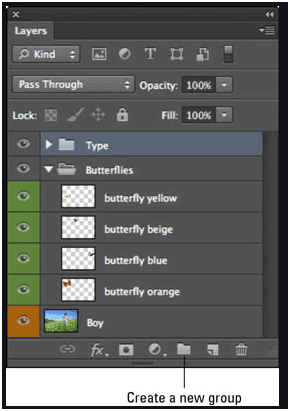
You’ll want to do this in the Layers panel. It is typically on the right side. Most images that have not been edited before will have just one layer called”Background”. You will have to convert it to a standard layer in the Layers panel so that you can edit it. The Layers panel is usually on the right side. If you do not see if, click Windows followed by Layers. Use the following steps to create a layer from the background:
Navigate to the Layers window.
Right-click the Background layer.
Select Layer from Background….
Leave the options at their presets and press OK.
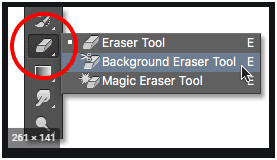
Step 4: Select the Magic Eraser tool.
To select the Magic Eraser, click the Eraser in the toolbar to the left, then click the Magic Eraser icon at the bottom of the screen.
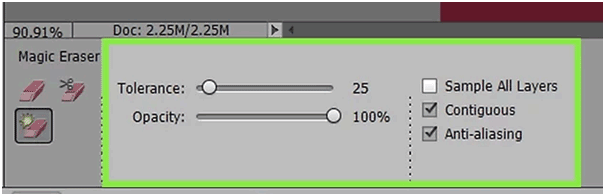
Step 5: Adjust the Magic Eraser settings.
When You select the Magic Eraser, you will See some settings at the top menu bar in the upper-left corner. Set the following settings:
Set Tolerance to 20-30. A low tolerance Will keep portions of your original image from being erased when you use the tool. If the Magic Eraser erases a lot of your subject, lower the tolerance. If it does not erase enough of the background, increase the tolerance. Use the following steps to adjust the Magic Eraser settings.
Check the Anti-alias box.
Check the Contiguous box.
Set Opacity to 100%
Step 6: Click the background.
The Magic Eraser will remove all of the Color that you clicked on, turning it into a transparent background.
If the Magic Eraser erases something you Don’t want to erase, you can press Ctrl + Z or Command + Z to undo the last thing you did. You can undo several steps using the History panel to the right. If you do not see the History panel, click Windows in the menu bar at the top and select History.
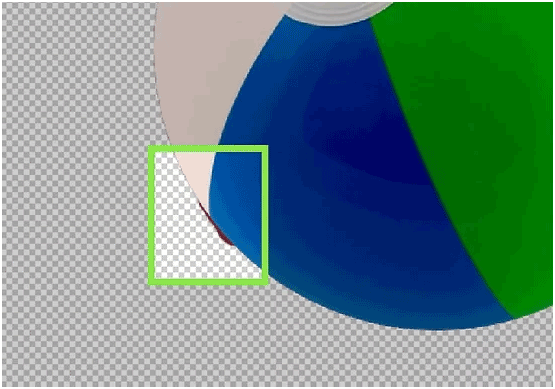
Step 7: Erase any leftover background.
If the background is Just One solid color, you Can probably erase the entire background with one click. If it has multiple colors, you might have to click different regions of the background to delete it all. If there are any areas of the background around the edges of your topic, you can use the regular eraser tool to carefully erases the remaining edges using single clicks.
Click the circle (brush) icon at the upper-left corner to display the brush menu. Select one of the solid circle brushes. If you wish to feather the edges around your shape, you can lower the Hardness level by about 10% or so.
Press [ or] to adjust the dimensions of the brush.
Step 8: Save your image.
You have an object with a transparent background that can be overlaid onto any other existing image. You will need to save the image in an image format that supports transparent images. Use the following steps to save your image:
Click File
Click Save as.
Enter a name for the file next to File Name.
Select PNG, GIF, or PSD in the drop-down menu next to “Format.”
Click Save
Third way of background removal in Photoshop
As promised, this the third way of removing the background in Photoshop. Follow the steps below:
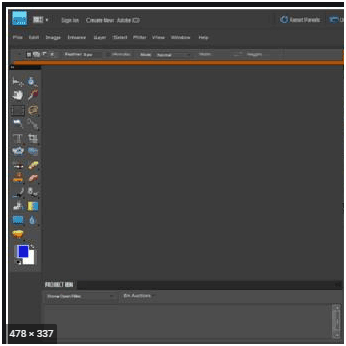
Step 1: Open Photoshop Elements.
It has a black icon with a picture that looks like a camera shutter in the center. Click on the Photoshop Elements icon to open Photoshop Elements.
Step 2: Open an image with a background you want to delete.
This method allows you to separate the subject from the background without actually deleting the background.
Click File
Click Open.
Select an image with a background you want to delete.
Click Open.
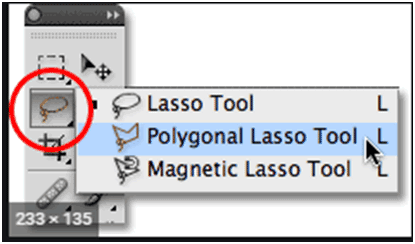
Step 3: Select the Polygonal Lasso Tool.
The Polygonal Lasso Tool comes with an icon that looks like an angular shaped lasso. To get it, click on the Lasso Tool in the toolbar to the left. Then click on the Polygonal Lasso Tool at the bottom.
Step 4: Aline the grey line along the edge of your subject and click.
This sets the grey line in place and Creates a new place with a new line attached to a mouse cursor.
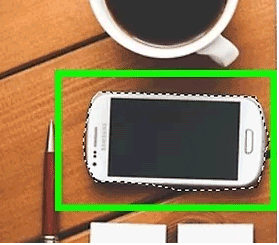
Step 5: Trace the shape of your subject using the Polygonal Lasso Tool.
Proceed along the edges of your subject and Click to make an outline around your subjects. Curved areas will need more clicks to get the shape just right. Straight lines do not need as many clicks. Take your time and be sure that the grey line outlines the shape of your subject as accurately as you can.
Instead, you can try using the Magnetic Lasso Tool from the Lasso Tool menu. It’s an icon that resembles the Polygonal Lasso Tool with a magnet. The Magnetic Lasso Tool will try to detect the edge of your subject as you trace around the shape of your subject. This may save you a small time, but it is not quite as precise as the Polygonal Lasso Tool.
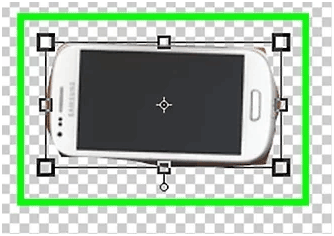
Step 6: Click the starting point of your outline.
When you finish tracing the outline of your Subject with the Polygonal Lasso Tool, click on the starting point of your outline to create a selection of your subject. When you create a selection, you’ll notice the grey line how resembles a moving dashed line.
Add or subtract areas of your outline.
Once you create a selection, you can add or subtract areas of your selection. This is helpful if there are parts of your subject you forgot to trace, or if your select something that is not part of your selection. Use the following steps to add or subtract from the selection:
- Add:
Select the Polygonal Lasso tool. Then Click the icon that looks two squares joined together in the bottom of the screen. Then use the Polygonal Lasso Tool to trace the area that you want to add to your selection.
- Subtract:
Select the Polygonal Lasso Tool. Then click on the icon that resembles a square cut from another square at the bottom of the screen. Then use the Polygonal Lasso Tool to trace parts of your selection you would like to remove.
Step 8: Copy and paste your selection.
You can either copy and paste it into a new Layer, or into another picture. Use these steps to copy and paste your selection.
Click Edit in the menu bar at the top.
Click Copy.
Click Edit.
Click Paste.
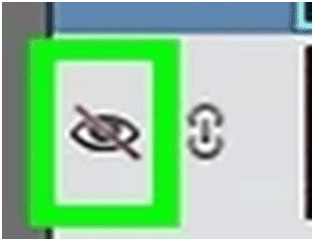
Step 9: Turn off the background layer
To turn off the background layer of your Image, click icon which resembles an eyeball at the next to the background layer in the Layers panel to the right. This disables the background layer and removes the background.
Step 10: Save your image.
You now have an object with a transparent background that can be overlaid onto any other existing picture. You will need to save the image in an image format that supports transparent images. Use the following steps to save your picture:
Click File
Click Save as.
Enter a name for the file next to File Name.
Select PNG, GIF, or PSD in the drop-down menu next to “Format.”
Click Save